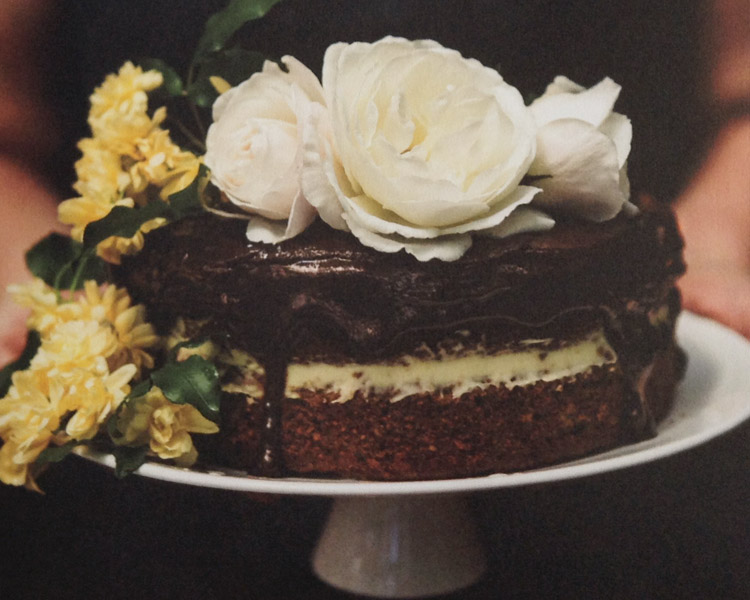
Layer cakes are extra special and this version from Nicola Galloway's Homegrown Kitchen is sure to delight.
INGREDIENTS
1 cup / 100g ground almonds or hazelnuts
2 cups / 300g white flour
¼ teaspoon salt
2 teaspoons baking soda
200g butter or coconut oil, at room temperature
¾ cup / 150g sugar or ⅔ cup mild honey
2 teaspoons pure vanilla extract
6 free-range eggs, at room temperature
2 large pears (approx. 400g), peeled, cored and roughly chopped
4 tablespoons Nut & Seed Butter* or tahini
1 ½ tablespoons apple cider vinegar
CREAM FILLING
200g mascarpone
1 tablespoon icing sugar or mild honey
1 teaspoon pure vanilla extract
CHOCOLATE GLAZE
½ cup / 125ml cream or coconut cream
1 tablespoon honey or maple syrup
1 tablespoon butter or coconut oil
2 tablespoons cocoa powder
50g dark chocolate (70% minimum), broken into pieces
INSTRUCTIONS
Preheat oven to 170°C Generously grease 2 x 20cm loose-bottom cake tins with butter, ghee or coconut oil and dust lightly with flour.
Place the dry ingredients in a large mixing bowl and whisk to evenly combine.
Put the butter/coconut oil and sugar/honey in a food processor and blend until creamy. Add the vanilla then the eggs, one at a time, mixing well between each addition. Add the chopped pear, Nut & Seed Butter/tahini and vinegar and blend well to combine. Stop the machine several times to scrape down the sides if needed. Pour the batter over the dry mixture and use a spatula to fold together. Pour evenly into the prepared tins and bake for 35-40 minutes or until an inserted skewer comes out clean.
Cool the cakes in their tins for 10 minutes then remove and cool completely on a cake rack. Make the Cream Filling. In a mixing bowl, beat together the mascarpone/creamed coconut, icing sugar/honey and vanilla until combined.
Make the Chocolate Glaze. Combine the cream, honey/maple syrup, butter/coconut oil and cocoa in a small saucepan and melt together over a gentle heat. Whisk to combine until the mixture reaches a gentle simmer. Immediately remove from the heat and add the chocolate pieces. Whisk until the chocolate is melted.
Assemble the cake. Once the cakes are completely cool, they can be layered and decorated. Place one of the cakes on a cake stand and use a palette knife to spread the cream filling over the surface so it comes right to the edges. Carefully place the second cake on top. Run a butter knife around the side to spread the icing evenly and create a naked cake look. Finally, slowly drizzle the chocolate glaze onto the centre of the cake, letting it gradually spread out and drip down the sides. The chocolate glaze needs to be just runny enough to spread evenly and drip down the cake but not so runny that it runs off the cake and pools on the plate. If required, cool or warm the chocolate glaze in a bowl of cold or hot water until it pours slowly. Decorate the cake with flowers if desired, and serve. Store extra cake in an airtight container and consume within 3 days.
TIPS
*See Nicola's recipe for Nut & Seed Butter on page 82 of Homegrown Kitchen. If you don't have time to make you're own, simply substitute with Tahini.
If you have only one cake tin then make the cake in two batches, having the second cake batter ready to go into the oven as soon as the first cake is removed from the tin.

